Composting with the help of worms is a practice known as vermicomposting and is a useful spin on the typical methods of composting. Read on and discover the benefits of vermicomposting, how it can be done and the different ways to use the finished product.
Benefits
As with composting, the benefits are numerous. It is a great way to deal with some of your kitchen scraps and get rich soil conditioner for your plants in no time. In the big picture, it reduces waste that would normally decompose at a much slower rate and contribute to the production of harmful leachates and greenhouse gases in a landfill.
Composting is a natural ecological process that you can speed up under the right conditions of oxygen, moisture, nutrients and soil organisms (like worms!). In vermicomposting, red wiggler worms take care of a bulk of the work. Bacteria, microscopic fungi and other soil animals also play an important role in producing extraordinary compost. Although traditional compost is a great fertilizer, studies have shown that vermicompost has a higher concentration of plant-available nutrients including nitrogen, phosphorus and potassium. You can use vermicompost to attain healthy plants without any need for synthetic fertilizers. Vermicompost also has an increased ability to hold moisture; it releases water more slowly, reducing watering needs.
A vermicompost does not require a lot of space; it can be done indoors and should not emit foul odours if it is well maintained. If you have limited space or wish to compost hassle free in wintertime, this method may appeal to you. You’ll appreciate it if you want results quickly, if you are curious about soil ecology or are fascinated by worms. Vermicomposting is also a great experience for children—they’ll get a thrill handling the worms and a front-row seat to see how waste breaks down and cycle in the natural world.
Materials and Set-up
Though it does require some commitment, once you’ve established an initial set-up, the process becomes easy.
The Worms
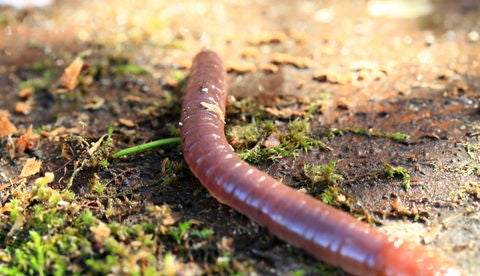
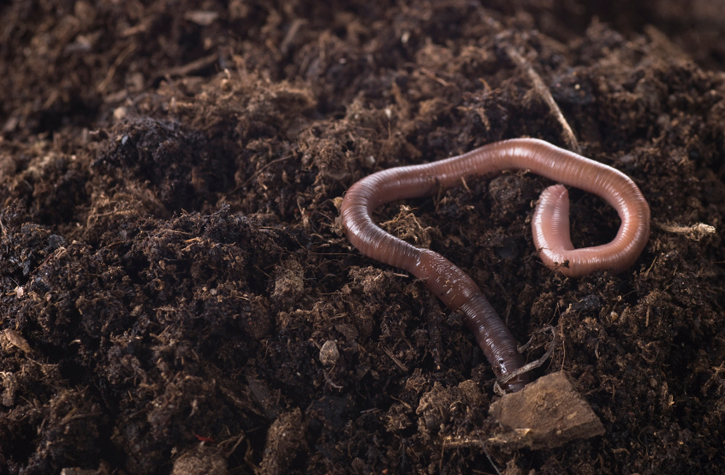
Eisenia foetida, the red wiggler (also known as red worm, compost worm, manure worm or red wriggler), is the best choice for your vermicompost bin. They will gorge on your scraps and are happy to stay within the confines or your bin, unlike the nightcrawlers (Lumbricus terrestris) commonly seen after a deep rain. Nightcrawlers prefer to feed in deeper layers of the soil, whereas red wigglers typically remain near the surface, feeding in leaf litter and on manure piles.
Healthy red wigglers will produce many offspring quickly. They are hermaphroditic, meaning they contain both female and male sex organs, and although they cannot reproduce on their own, they all have the capacity to lay cocoons and fertilize them. If you notice small yellowish grains in your compost, these are the cocoons. On average, each one will hatch out three worms, though it is often more. It takes about six weeks for the young worms to reach sexual maturity and begin to breed. This means the number of worms in your bin can double in just a few months. Given their reproductive rate, one of the easiest ways to obtain worms to start vermicomposting is from someone who already has an established bin. If this is not an option, you can usually purchase them from fishing bait shops or online.
The Bin and Its Components
Almost anything can be used as a bin; a great inexpensive choice is an opaque plastic lidded storage bin. Another popular choice is a blue recycling bin, which some municipalities equip with a lid. The worms do not like sunlight, so avoid any transparent materials even though you may be tempted to watch your worms at work. A lid is important to help prevent fruit flies and other pests from hovering over your compost. If you prefer to recycle, an old shipping crate or even a drawer no longer in use can serve as a bin. However if you choose wooden material over plastic, be aware that it will break down more quickly from moisture. If you are not keen on a do-it-yourself project, many complete kits can be purchased from locals easily found online, green community centres or sometimes even through your municipality.
A well-aerated bin is crucial to the success of your vermicompost; for this you’ll need to drill several holes in the lid. This not only provides air, but also helps manage any excess moisture or humidity. Approximately 10 to12 holes with a diameter of roughly one centimetre will be sufficient. If you’re up to another step, or find yourself repeatedly dealing with soggy compost, drill holes on the bottom of the bin to allow water to drip out and collect. Add a piece of screen to line the bottom of your bin to contain the compost and prevent any worm escapes. As a side note, red wigglers will not try to escape unless the conditions in the bin are less than favourable. (See the Challenges and Solutions section below if this is happening to you.) Now, set up a small stand on which to place your bin so that a tray can be put beneath to catch any dripping water. You can dilute this water and use it as a fertilizer before your compost is even ready
Finding Your Optimal Bin Size and Worm Quantity
Generally, a bin with a larger surface area is preferred over a deep container. This reasoning is based on the worms’ behavioural biology. They are epigeal, which means their activity is generally above ground within the leaf litter. Scraps spread out over a larger area will be processed more quickly than if the materials were buried within a deep bin.
Choose a bin to suit the amount of scraps your household produces. You can have as large of a bin as you like, keeping in mind that a large bin will become quite heavy if you need to move it. General guidelines from Environment Ontario are as follows: One to two people will likely need about half a kilogram of worms in a bin that is 30 centimetres high by 45 centimetres in length and 60 centimetres wide. Two to three people might use one kilogram of worms in a bin that is 30 centimetres by 60 centimetres by 60 centimetres. While a larger family of four to six people will could need one to two kilos of red wigglers and a bin that is 30 centimetres by 60 centimetres by 105 centimetres.
To be sure of the quantity of worms you’ll need, keep your food scraps aside and weigh them each day for a week or two to get a good sense of how much to feed these voracious creatures. The red wiggler will eat the equivalent of its own body mass each day; however, only half of that comes from the food scraps; the other half is from the bedding. For example, 450 grams of worms can process 225 grams of your food scraps in a day. This is variable of course, so adjust the feedings according to your worms’ appetites and you learn as you go.
A Spot for Your Bin
Consider where you’ll keep your bin. Common places include the kitchen, often under the sink, in the garage or in your bathroom. The worms will be happiest between the temperatures of 17°C to 22°C, but they can do well in much cooler or warmer temperatures. You can even keep your worm bin outdoors on a balcony or in a shady spot in your yard, though it must be brought back inside for the cooler months, once the temperature dips below 4°C. If you would rather keep your vermicompost outside year round, you can build an insulated outdoor enclosure out of wood. Use an insulating Styrofoam material and monitor the temperature if you can. Although the worms can withstand cooler temperatures, they will probably reduce their activity and feeding levels, so you may have to adjust the feedings accordingly.
The Bedding
In any compost pile, you need to balance the nitrogen to carbon ratio. Since most of the added scraps are fresh and rich in nitrogen, you will need to make sure the bedding is high in carbon.
Bedding is the medium the worms live in and also serves as part of their diet. It should be moist, but not soggy wet. After an initial watering, you likely won’t need to add much water because the decomposition process usually provides sufficient moisture. You eventually may need to add dry bedding materials to the bin as needed.
The bedding should be relatively light in texture so that the worms can easily move about. Great bedding choices include leaves, which can be collected in the fall, coconut husk sold as “coir,” straw chopped up finely, peat moss and shredded paper or cardboard. Avoid any glossy or heavily coloured paper, though greyscale newsprint is fine as nowadays it contains mainly vegetable-based inks—double check your paper to be sure. It is best to create a mix of these substrates, for example, one part shredded and soaked newspaper to one part coir or one part leaves to one part peat moss. Use three or four different materials if you can. As a final step, add a few fistfuls of sand or potting soil to the bedding, which the worms ingest and store in their gizzard to help with digestion.
Feeding Your Worms
Typically, feeding the worms one to three times a week is sufficient. In between feedings, you can store your scraps in a container with a tight lid. Letting the scraps sit for a few days before feeding them to the worms allows for a good buildup of microbial activity on the surface of the scraps; this is what the worms actually consume. For the same reason, when building your initial set-up, you may add the bedding and the scraps days before adding the worms. The amount of scraps you add is dependent on the number of worms and the size of your bin, as mentioned earlier.
Keep in mind that the smaller the size of the food scraps, the more rapidly they’ll break down. Try to feed in a different area of the bedding each time; devise a rotation and stick with it to get even quicker results. Be sure to cover the food scraps with some bedding to discourage pests.
Food scraps to include:
• Fruit and vegetable scraps
• Coffee grounds and tea bags
• Plant trimmings
• Finely crushed egg shells
• Unprocessed hair (chopped finely so the worms do not become entangled)
Problem items:
• Meat and fish
• Dairy products
• Onions or garlic
• Oils and fats
• Sauces, dressings and vinegar
• Salts (If you have a water softener, do not use this water in your bin.)
• Pet and human waste
You’ll want to avoid the listed problem items because they are either bad for the worms or will rot if not eaten quickly, resulting in an unpleasant odour that will attract fruit flies and house flies. Take care to moderate the amount of citrus fruit peelings and coffee grounds that go into the bin due to their acidity. Limit potato peelings as well, because they can take a while to decompose. It is best to feed your worms a good variety of food scraps in order to maintain the pH balance of the bin and to allow for healthy worms. Adding crushed eggshells every week or so will not only help balance the pH level of your bin but also provides the worms with the calcium needed to produce cocoons.
If you like, you can include cooked pasta, rice, bread and beans that do not have any added salt, oils, sauces or dressings on them. However, adding these carbohydrates will require extra monitoring to verify that they are being processed quickly enough.
Harvesting the Finished Product
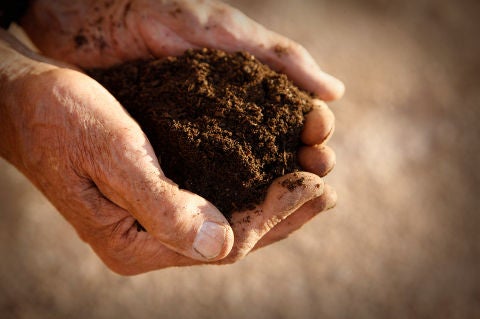
You should have a finished product approximately every three months. The compost is ready when it is more or less uniform in colour and texture. It will look like a dark, crumbly soil. This finished vermicompost is mainly composed of worm castings (worm waste) and some partly decomposed materials. The more worm castings you see, the more processed the scraps are and the more urgently you’ll need to harvest the compost. Large quantities of finished castings are detrimental to the red wigglers’ health. Rest assured that the castings are non-toxic for people and pets. They can be safely handled with bare hands, even for children.
There are a couple of main approaches to harvesting vermicompost. If you can afford to wait for a bit, simply swipe the finished compost toward one side of the bin and add fresh bedding and lots of scraps to the other side. The worms will slowly move toward the fresh food source on the opposite side. This generally takes four weeks; you can then scoop out the finished product from the side the worms have vacated. For a hands-on approach that is a little more labour intensive but will get you compost faster, place the contents of the bin on a tarp or newspaper. Then either shine an artificial light source on it or allow the sunlight to hit the pile and wait a few minutes. The worms will move down and away from the light source, allowing you to skim off a worm-free layer of the compost. Repeat this process until you’ve harvested most of the castings. Be sure to keep aside any young worms and cocoons (they look like little yellow grains of rice) if you want your colony to grow. Prepare your bin with fresh bedding and lots of food scraps and then return your worms back to their home.
Making Use of the Castings
Here are a few suggestions for putting the compost to good use:
• Mix it with soil for starting seeds or for potted plants. Using just one part compost to 10 parts soil will give you optimal results; this is only a 10% mix. You can add more if you like; however, using more than two parts vermicompost to five parts soil (a 40% mix) may do more harm than good.
• To use this compost in your vegetable gardens and flower beds, simply place it between plants and gently work it into the soil.
• Use it for your transplants. Add some to the bottom of the hole you have dug before transplanting.
• Spread it beneath your trees and shrubs to give them an extra boost.
• Sprinkle it on your lawn for naturally healthy grass.
• Make a compost tea by adding roughly ¼ cup of vermicompost to two litres of water and let it sit for a 24-hour period. Mix this solution every once in a while. Use it for watering plants and spraying on leaves.
If you end up with more compost than you can handle, give some away and become a favourite neighbour or friend.
Challenges and Solutions
Don’t let the following challenges prevent you from enjoying the benefits of vermicomposting. Remember that your compost bin contains its very own mini ecosystem and may fall out of balance on occasion. Just know that with a bit of patience, balance can easily be restored. The following is a list of common gripes and how to deal with them:
“I have fruit flies.”
Your worms may have more food than they can process, or the scraps were not sufficiently covered. To remedy this issue, bury the food scraps, cover the castings with wet newspaper and top it off with dry material. You will also want to moderate feeding.
“I see other creatures among the worms.”
Again, remember you have created an ecosystem in your compost bin. It is normal to see other invertebrates move in and help out with the breakdown process. Don’t be startled if you see white pot worms, tiny mites, sow bugs, springtails or even centipedes and millipedes. Leave them be in your bin to do their job.
“My worms are trying to escape.”
One of three issues may be at play. The compost is finished and the castings are now toxic for the worms. Alternatively, the pH may be too low, or the contents may be too wet. The wisest move is to harvest the bin and start fresh with new bedding. If your batch is too acidic, you can try adding alkaline materials such as finely crushed eggshells. If your contents are too moist, see the next complaint.
“My bin is really wet and leaky.”
Perhaps you are feeding the worms too much. Remove the lid, mix the castings and scraps around to provide oxygen, add some dry bedding materials and adjust feedings.
“My compost seems dry.”
Simply sprinkle some water over the castings.
“My bin smells bad.”
There may be too much food and not enough worms to process it. Either remove some of the food or add more worms.
“I smell ammonia.”
There are likely too many fresh scraps, which release the nitrogen that produces the smell; you’ll need to add carbon-rich materials like those of the bedding.
“I smell sulphur.”
The bin is possibly too moist and isn’t getting enough oxygen. To remedy this, add dry materials like leaves and newspaper to create a layer at the bottom of your bin, then add some more bedding to the compost, give it a stir and reduce feeding for a while.
- 0
- 1


