Old Field Garden and Wildflower Nursery
Learn how to grow the Canada Lily — a tall, graceful inhabitant of eastern Canadian meadows and open woodlands

Since the inception of the Old Field Garden and Wildflower Nursery in 1985, one of our centres of interest has been the propagation from seed of the Canada Lily (Lilium canadense). It has taken us an average of seven years to grow blooming size specimens. However, we now have a population of over four hundred plants at various stages of maturity and have been growing third generation plants for several years.
As one of our goals at the Old Field Garden is to promote all levels of biodiversity, we reproduce plants from seed whenever possible in order to enhance the genetic pool of the species with which we are concerned. The use of shoots and layering, while appropriate in certain instances, produces clones that are exact genetic duplicates of the parent plant and therefore does not contribute to intra-species diversity. Reproduction from seed is usually slower, but in the long run does more for our natural heritage.
Except in extreme cases, we allow pollination to take place naturally to promote a maximum of diversity. We have never noticed any difficulty with pollination except, perhaps, when an isolated plant has had only one flower. Otherwise, we have consistently had up to 90% pollination or more.
Shaped somewhat like miniature footballs, the pods are ripe when their external surface is light brown, crisp, and ready to split at the top under a slight pressure. The seeds are thin, translucent light brown flakes. While still in the pod, the seeds are stacked tightly in three distinct chambers that seem to help the plant avoid total predation. When opening a pod, some care is required so that the seed does not spill out uncontrollably and drift away.
As with other native species, we try to plant the seed as soon as possible. As the embryo does not seem to be completely developed at the time of seed ripening, we allow, if possible, at least six weeks of warm (ordinary) fall weather before the cold hits.
Growing From Seed
Follow these steps:
- Begin by filling a flat three- quarters full with good sandy loam. (We never sterilize soils - that kills everything, both "good" and "bad" — and simply deal with "weeds" as they appear.)
- Spread a good quantity of seed on top of the soil, being careful that seed-centres do not overlap.
- Press down gently to stabilize the seeds and then cover the whole surface with at least 1cm (a half inch) of medium textured mulch (only slightly acid). Try to include some fibres and even fine stems and branches because they help to prevent the mulch from washing away in the rain.
- We place the flats outside in a safe but accessible place as soon as possible in the fall. Protect the flats with chicken wire if there is danger from squirrels, and begin waiting for spring. (Alternatively, you can store the flats in a fridge at 4 degrees Celsius.)
- It is vital that the flats never dry out.
If all has gone well, in late spring seed leaves will begin to appear. As lilies are monocots, these leaves look like fine blades of grass. Under the mulch, a small bulblet has formed between the seed leaf and a fine root. We usually leave everything as it is in the flat for the first full year to allow the bulblet to develop.
The following spring, the seedlings once again show only single leaves, but now slightly broader; we can then begin to remove the young plants gently from the flat (a painstaking job, but helped if the soil in the flat is relatively sandy), and plant them four or five to a 6" pot at the same depth they were at in the flat. We then put well rotted "horse chips" on the surface of the soil for mulch.
For at least another year, maybe two, the seedlings will show only one leaf, but they will become progressively larger and more spatulate (shaped like a spatula) in shape. Underground, a bulb will be formed of several bulblets adhering to each other.
Finally, about four years after germination, the first stem with a whorl of leaves will appear. In late summer, when the new bulbs have been formed, we transplant the "juveniles" into their own individual pots. Since they "wander" to the edges of the pots, they usually need to be repotted one or more times before they finally bloom around their seventh year. We watch the bottoms of the pots for signs that the plants are getting "impatient" - if not caught in time, they can easily send a stolon out of a drainage hole and try to form a new bulblet on the outside. The plant is now certainly ready for "planting out!"
The seedling leaves of the Canada Lily die back in late summer. Juvenile leaves often disappear early in the growing season due to predation, but this does not mean that the seedlings in question are lost. More often than not, they send up a new leaf the following year, set back somewhat in their development perhaps, but otherwise healthy.
Frequently, in a Canada lily's first year of bloom, only one flower is produced. Healthy, mature plants, however, usually produce many more. This year, some of our Canada Lilies had from 8 to 12 flowers, a glorious sight.
Planting

The location chosen for planting native lilies should correspond as much as possible to their native habitat. The Canada, Michigan and Turk's Cap Lilies are found in damp forest edges, clearings, and meadows in well drained, slightly acid to neutral humus-rich loam. The Wood Lily is found in dry woods and clearings in sandy, quite acid soil. Both sets of requirements can be filled in most gardens if care is taken to watch over watering, drainage and mulches.
Lilies that like damp conditions can prosper in garden loam enriched from time to time with leaf mould or well rotted "horse chips." They need at least a half-day of direct or slightly filtered sunlight, or they will not grow to their maximum and may fail to bloom. The Canada and Michigan Lilies (we are not sure of the Turk's Cap's limits) can tolerate full sun, but only if the soil remains damp and the bottom portion of the plant is in deep shade, as in a lush meadow or raspberry patch. Ensure that the soil around lily bulbs is protected from over heating by the sun. At the Old Field Garden, we have found that tall grasses, raspberries and ferns do the job of shading and cooling well, but any plant that does not crowd out the lilies would do.
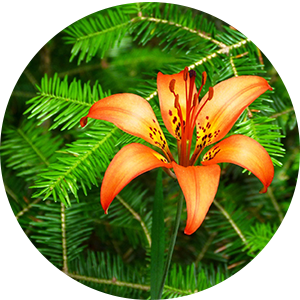
Requiring a much more acid, sandy soil, the Wood Lily is perhaps more tricky to establish in a small garden unless there is already a conifer growing on site to help acidify the soil. We have observed that this lily can tolerate, and perhaps even appreciates, some limited periods of full sun, but it also thrives in dappled light. The important thing is to have a fairly dry site and to keep the plant nourished with acid mulch.
Lilies should be planted at the depth they have established while becoming mature — somewhere around three times the height of the bulb — then well covered with mulch. Lilies can burrow down in the soil to find the depth they prefer, but they cannot move upwards. If, then, there is any doubt about planting depth, it is better to be too shallow than too deep.
We recommend that any of the lilies be fairly well spaced. The first reason is aesthetic: when they are mature, the flowers of these lilies have a characteristic shape that is obscured if other plants are too close by. We have learnt that "clumping," while it creates an impressive effect, works against the intrinsic beauty of the individual flowers.
The second reason for adequate spacing is safety from predators. In our experience mice love the Canada Lily, especially at the moment of bloom. They cut the stem at the base, and then cut it up into sections as they dine on each whorl of leaves. And there is a new threat: the Red Asian Lily Beetle which has struck wild populations of lilies in Quebec as well as garden hybrids and has become so difficult to control in the Ottawa area that even veteran gardeners have begun to pull out their lilies in despair. The only viable remedy seems to be picking off the beetles daily by hand. Spacing plants makes them more difficult for predators to find and makes observation and care easier.
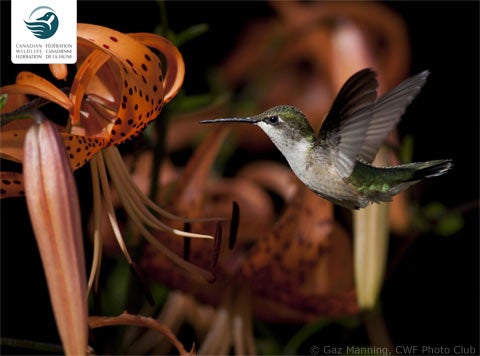
Some thoughtful placement will allow you to enjoy the magnificent beauty of North America's native lilies — from the flaming bright orange-red of the large Turk's Cap Lily (a more southern species) to the Canada Lily whose flowers range from a radiant lemon yellow through various orange hues.
Monocot (Monocotyledon): A flowering plant that has only one seed leaf in the seed.
Whorl: Three or more leaves arranged in a circle around the stem.
Stolon: A horizontal branch from the base of a plant, running at or just below the ground surface, that produces new plants.
Copyright Notice
© Canadian Wildlife Federation
All rights reserved. Web site content may be electronically copied or printed for classroom, personal and non-commercial use. All other users must receive written permission.
- 0
- 1


